A minimal home server "case"
I have this old home server. Nothing fancy, basically just a Mini-ITX board with a passively cooled CPU, some RAM, an SSD for the software and five HDDs for storing random stuff. Its power consumption is so low that it doesn't need a big ATX supply, but can run off a PicoPSU and an external power brick. Of course I had a proper case for it, the very nice and sturdy BitFenix Prodigy.
Then I moved house and transported the server in my checked luggage, but (of course, I guess?) they must have dropped it from the aircraft hold, since it arrived completely bent but thankfully still functional. After some years of tropical weather though, its soft plastic "feet" started to dissolve. A new case was overdue, so when I recently moved again and having already exceeded my luggage allowance by far, I threw out the case and took only the innards along.
There are certainly a few more relocations coming up in the near future, so I wanted something as lightweight and compact as possible. As so often, I wasn't happy with any of the commercial products I could find, so I resolved to DIY something and started thinking about the most minimal solution possible. The simplest version of a HDD cage would probably be just two simple plates between which the HDDs could be screwed in. And then I could just mount all the other components outside on these plates. Not really a case, but it should hold the parts together, and if I take it all apart to move house again, I'll only have two flat plates to deal with.
Back to the drawing board
I was going to come up with a nice 3D models of all the server components, and then use them to design suitable mounting plates. This turned out to be much more complicated than expected, due to conflicting online sources on the positions of mounting holes, and the general overhead of 3D modeling, while in fact, a simple paper sketch should do as a first draft. Just physically moving the disks across the paper and outlining them made for a much better visualisation.
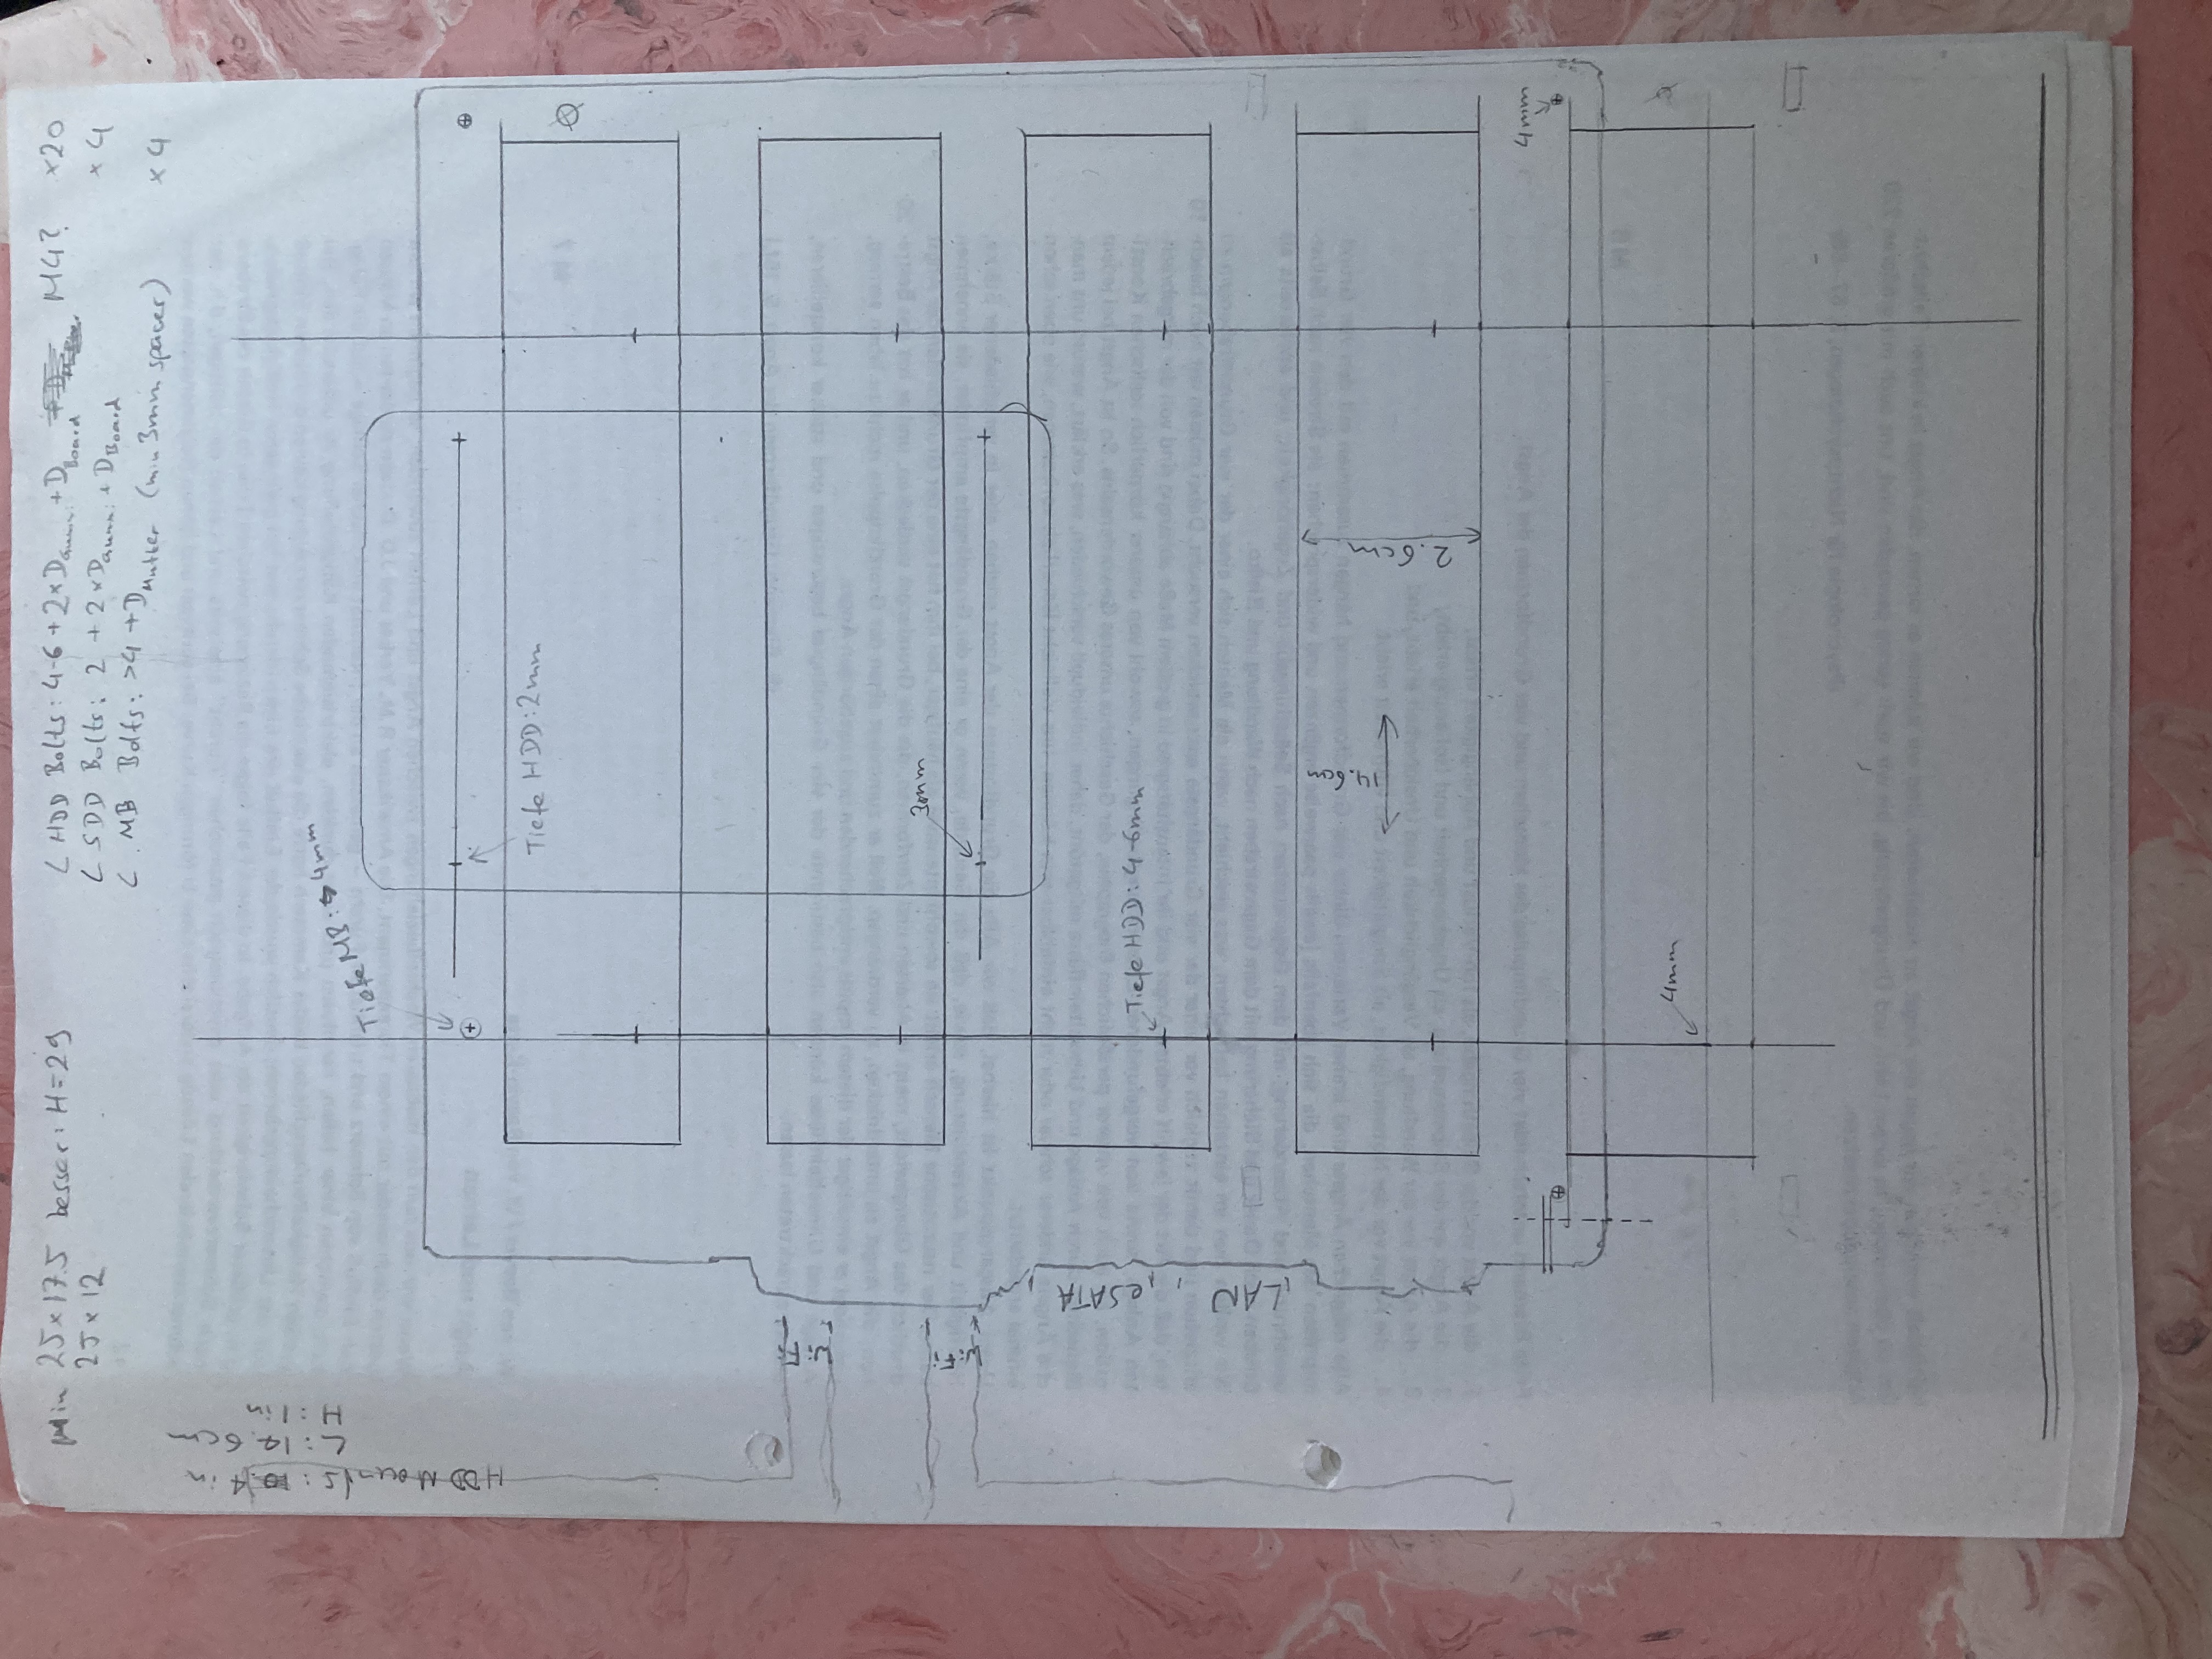
The sketch did turn out a bit wonky though, so I did finally redraw the two plates in 2D CAD (QCAD) to get the angles and dimensions right.
Material choice
For the material, I originally envisioned wood or black acrylic. These happened to be a bit rare and expensive in local shops though. Another consideration were vibrations. The original housing used rubber sleeves on pins to mount the drives in their cage. This was to decouple them acoustically from each other and the housing, leading to less noise and less impact of the vibration on the durability of the drives. For my version, I was looking into using rubber grommets in between the HDD bolts and the side panels. But I also struggled to find those in suitable dimensions. Finally I stumbled upon black hard foam plates at a hardware store. They were cheap, looked easy to cut and should absorb vibrations to some extent without the need for extra parts. I was a bit worried about the plates being rather wobbly, but once the HDDs were mounted between them, they provided enough stability and there's no issue.
Building the "case"
Having been a bit spoilt by the maker spaces at Singapore's public libraries, I was probably too fixated on laser cutting the panels. But it turned out that the trusty old fretsaw would do just fine and was overall probably even faster than the whole laser cutting workflow.
So I just printed the QCAD drawings 1:1, stuck them onto the plates using scotch tape, and cut and drilled through them.
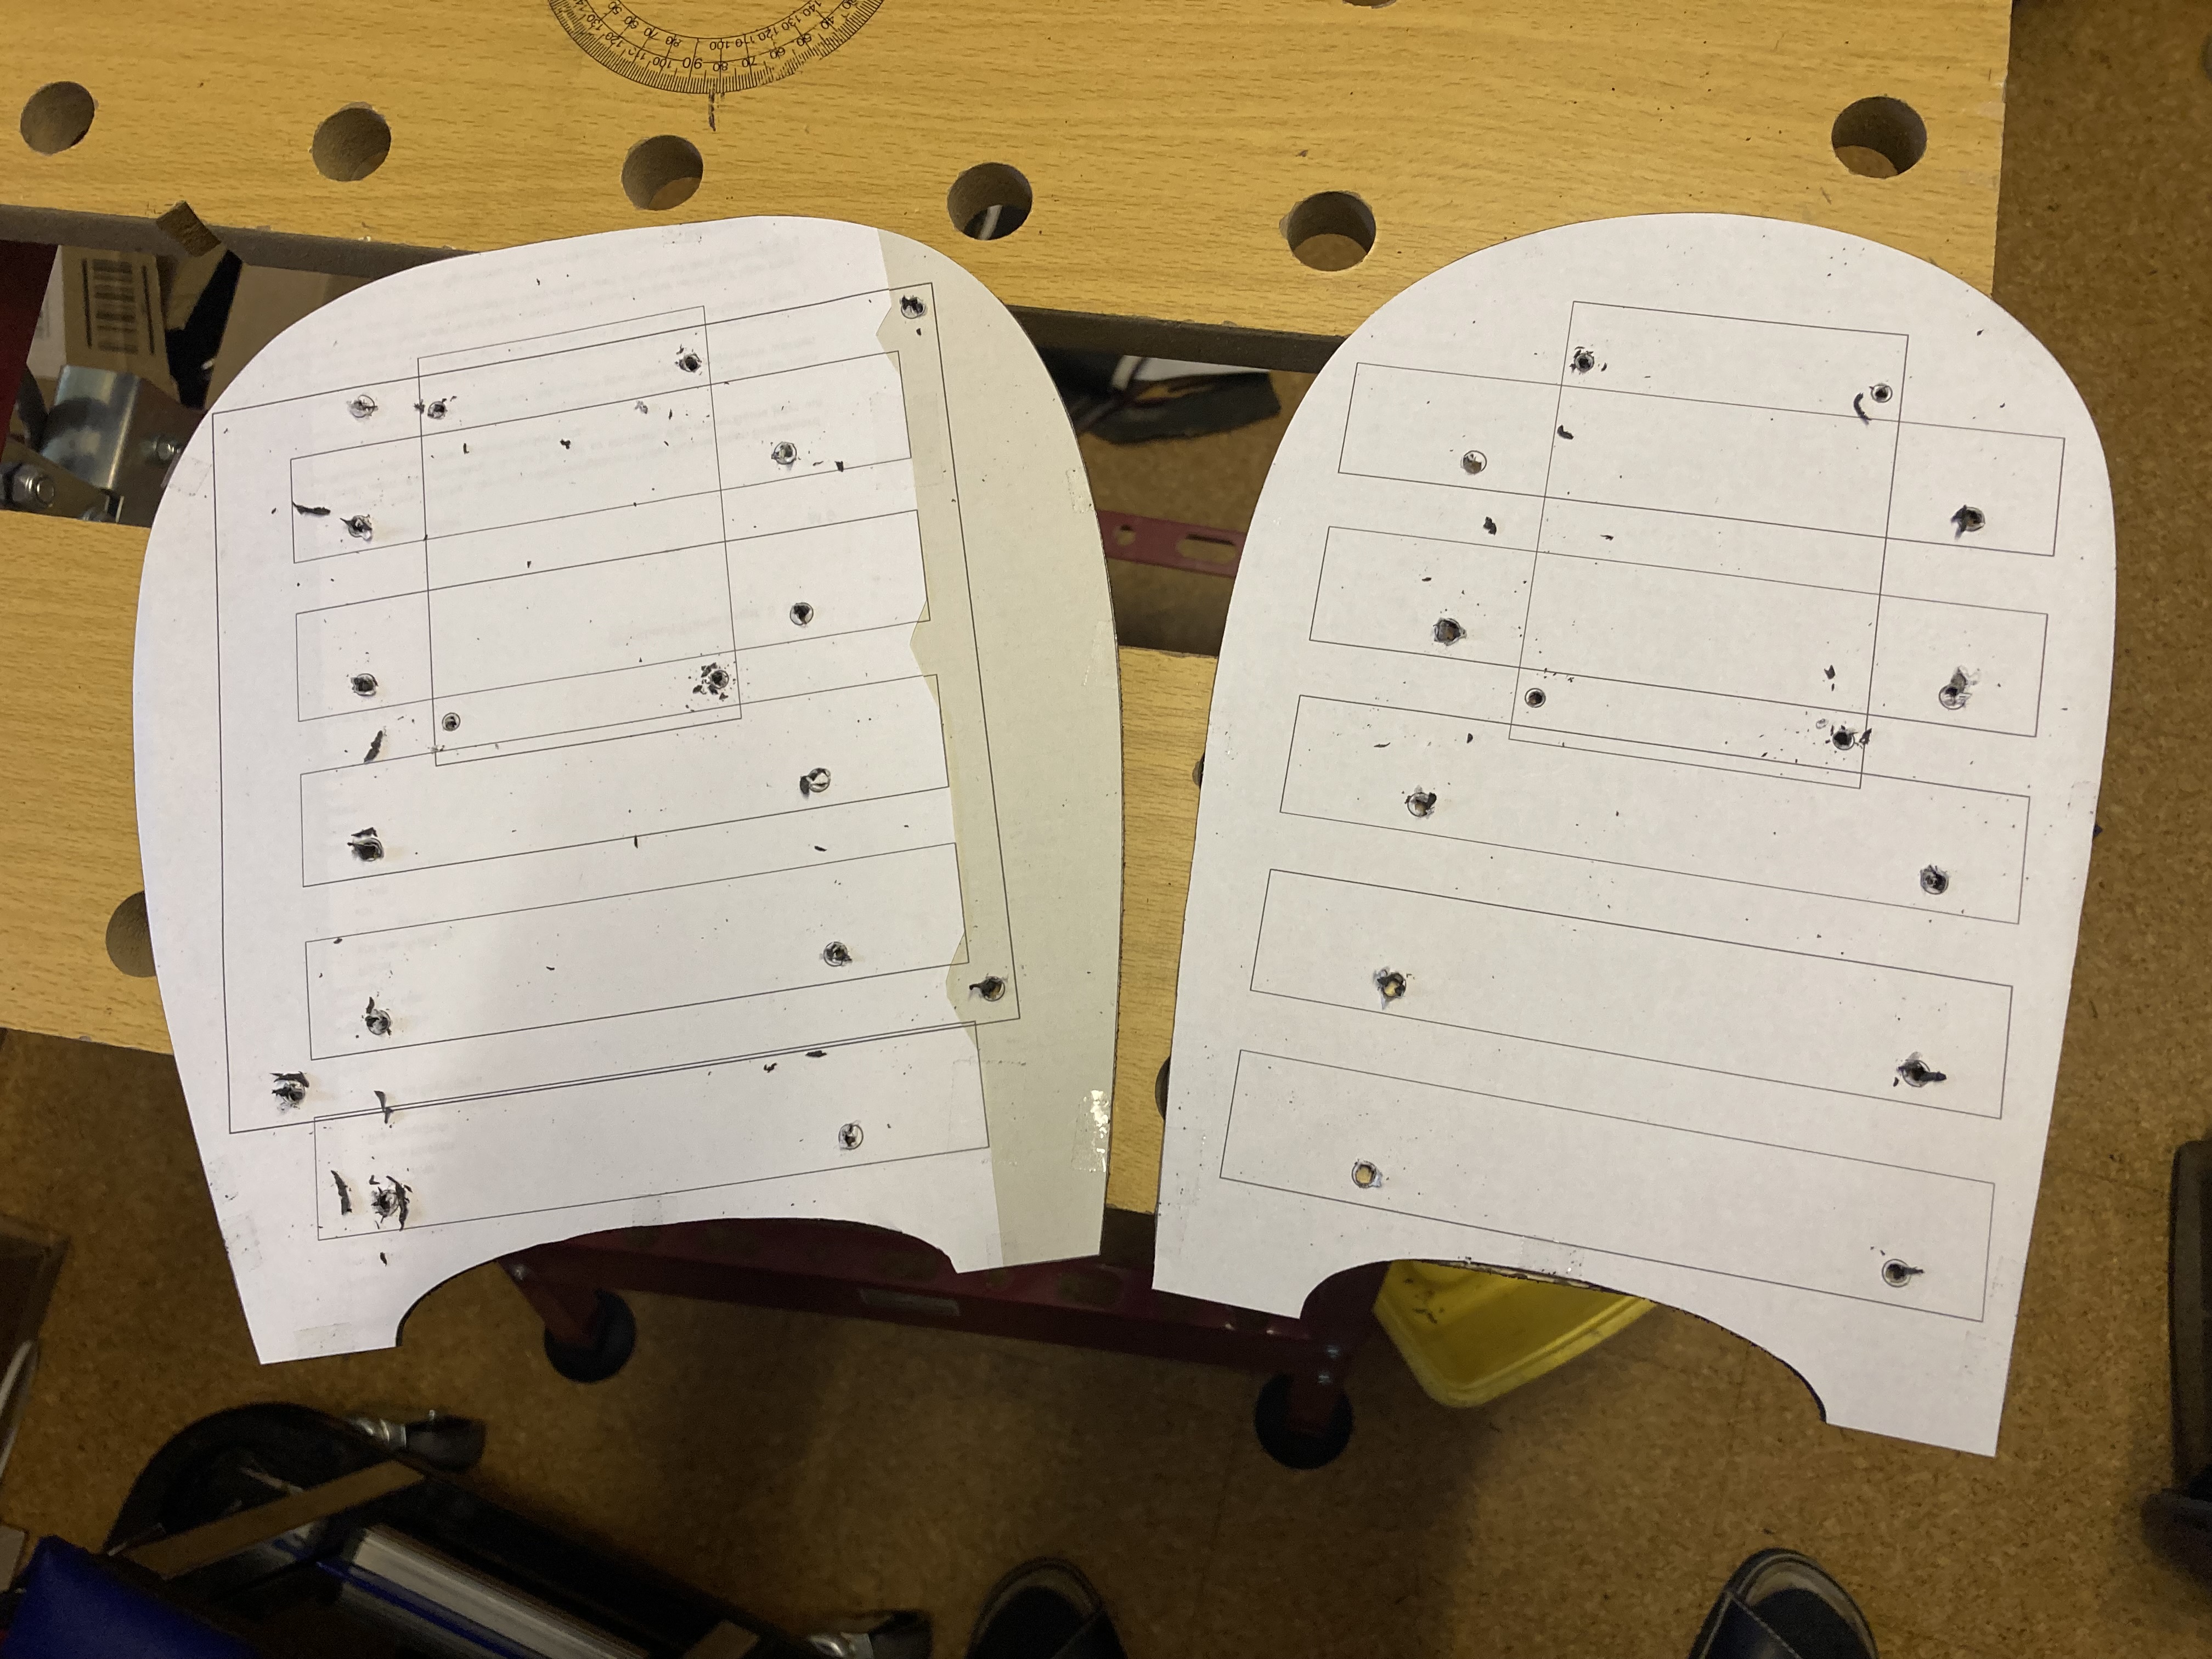
The rectangle on the upper half of each plate is the outline of the 2.5'' SSD for the system drive with its mounting holes. Of course there's only one system drive, but I had laid out all the mounting holes on a single drawing first, and forgot to delete the original after duplicating it for the second plate. While being so focused on drilling all the holes accurately, I forgot that I didn't want to drill those four ones. Made a mental note not to work with unfinished drawings again, but these holes will be hidden behind the mainboard after all, so they won't be very visible.
The outline was easily smoothed out using sandpaper. The drilling holes required some rework with a sharp pen knife. But I think the result looked quite nice, and all the parts fit on first try.
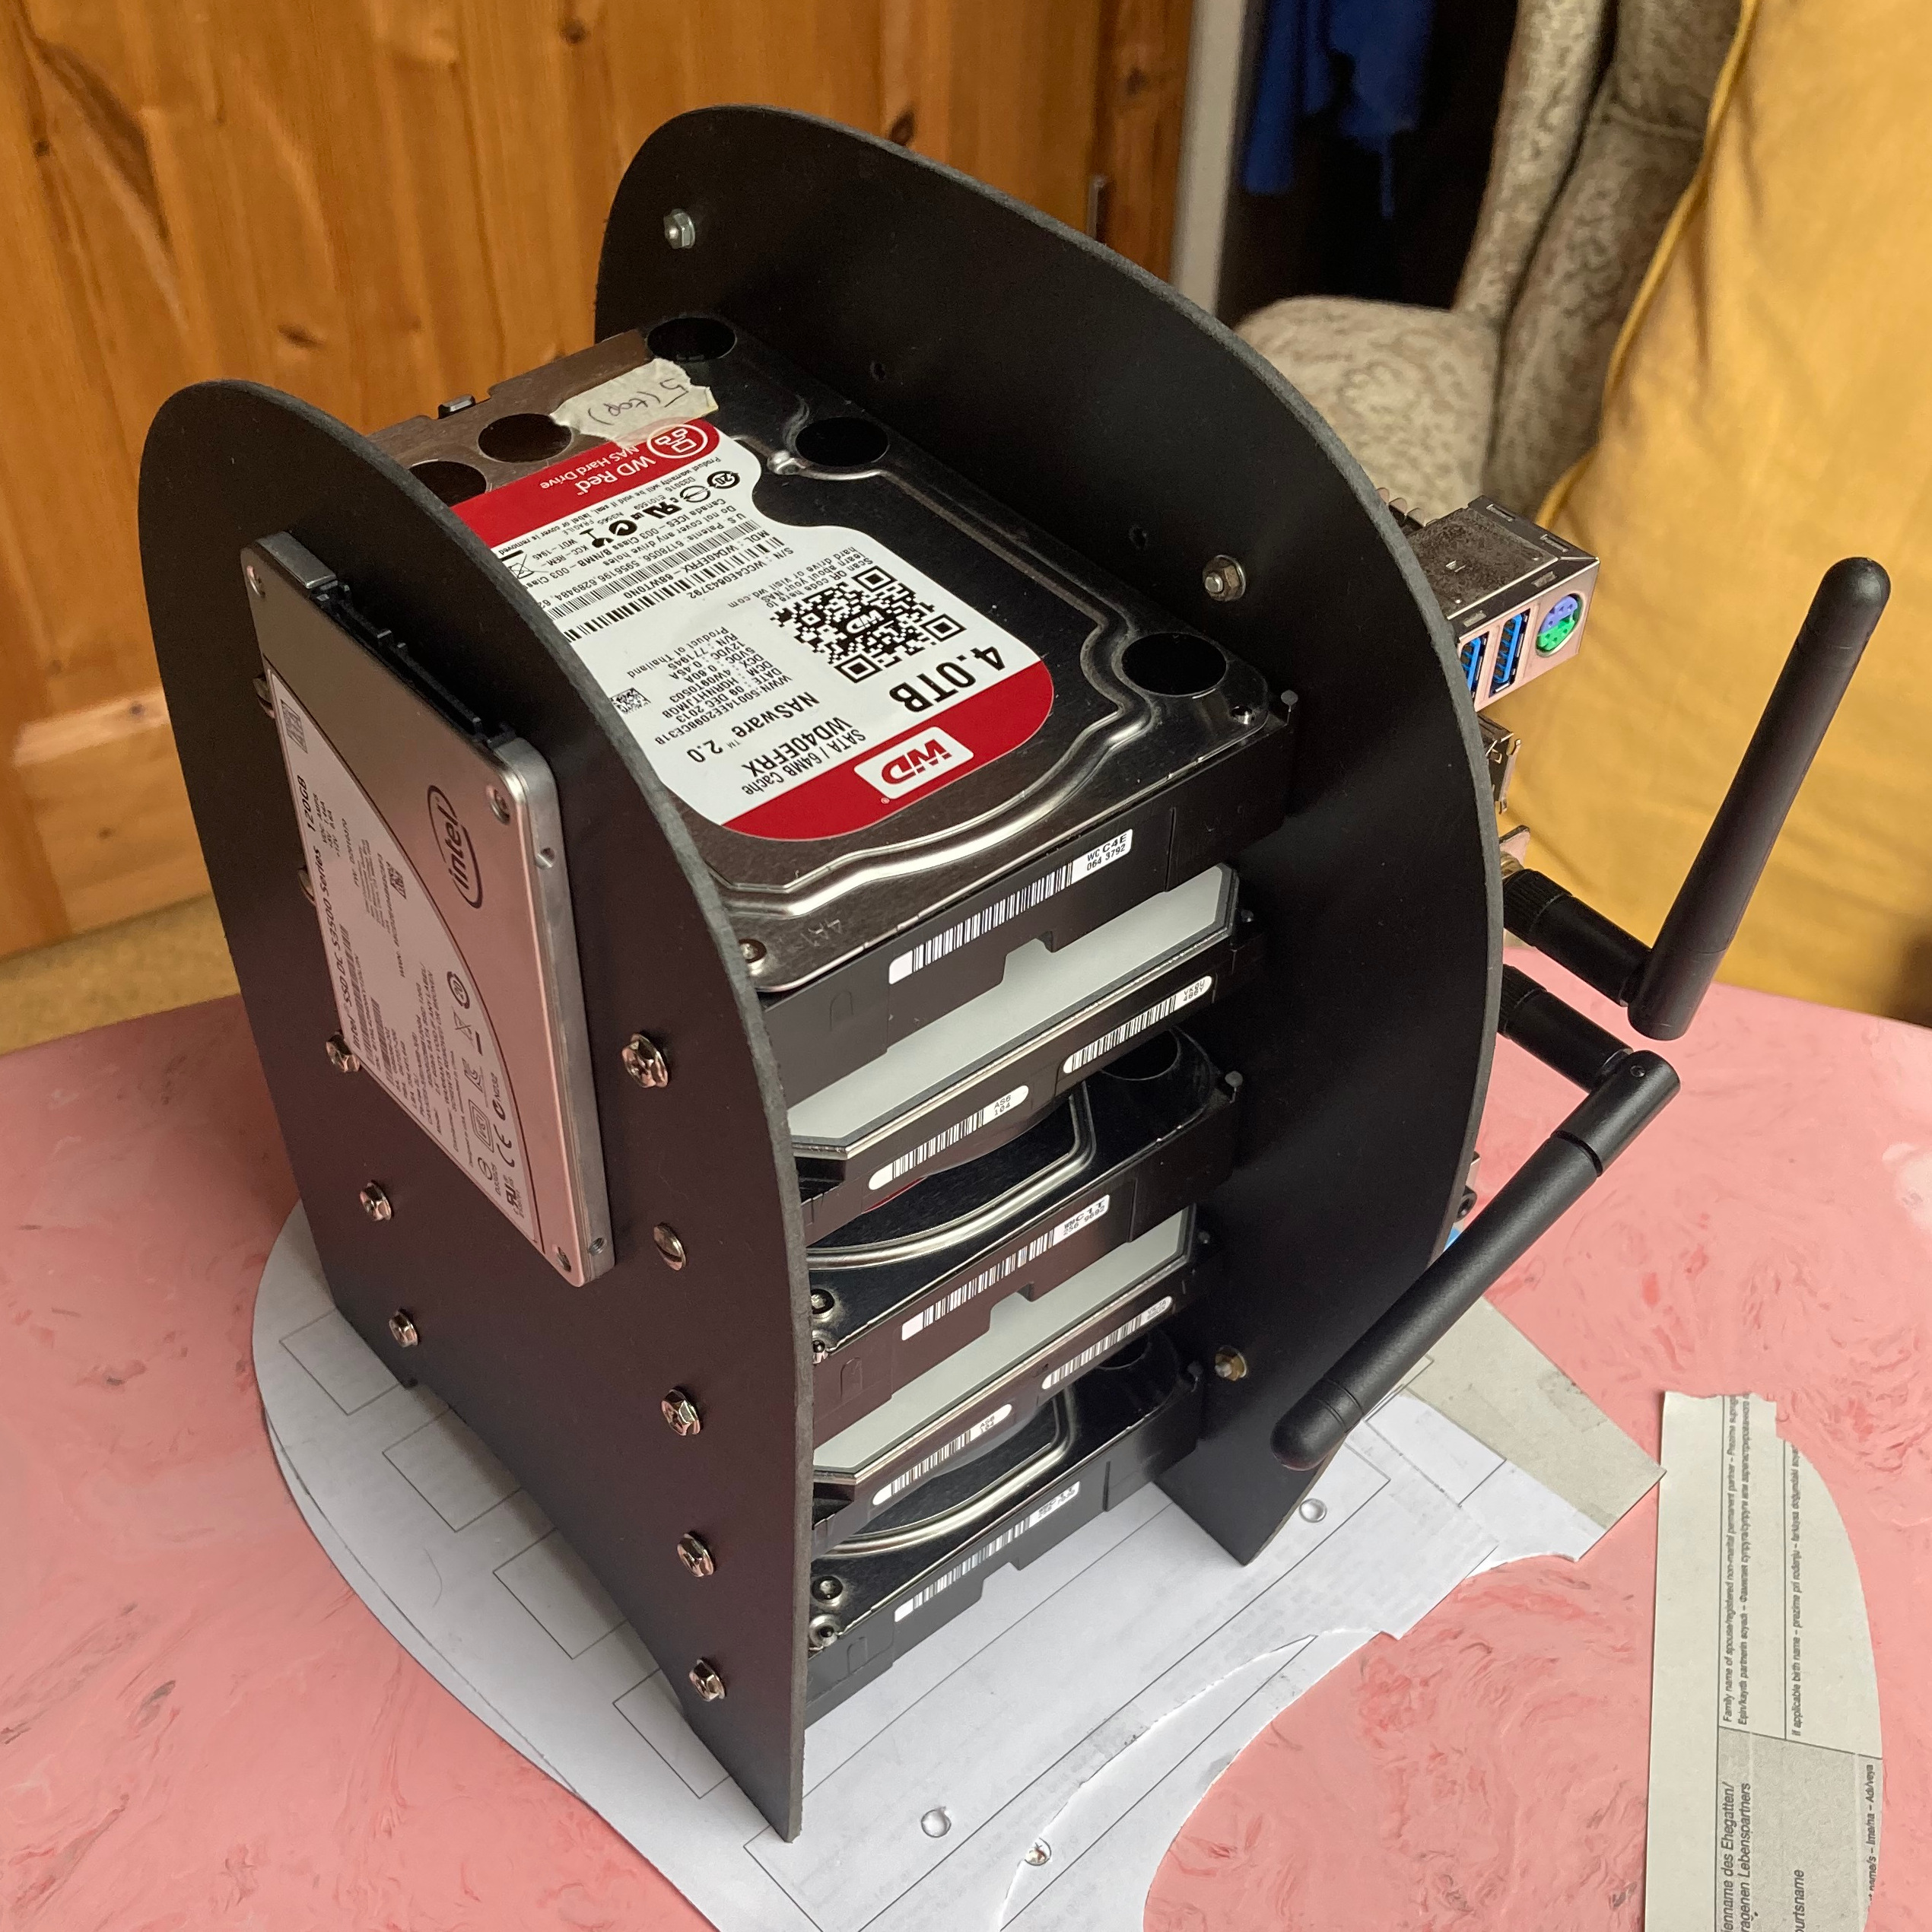
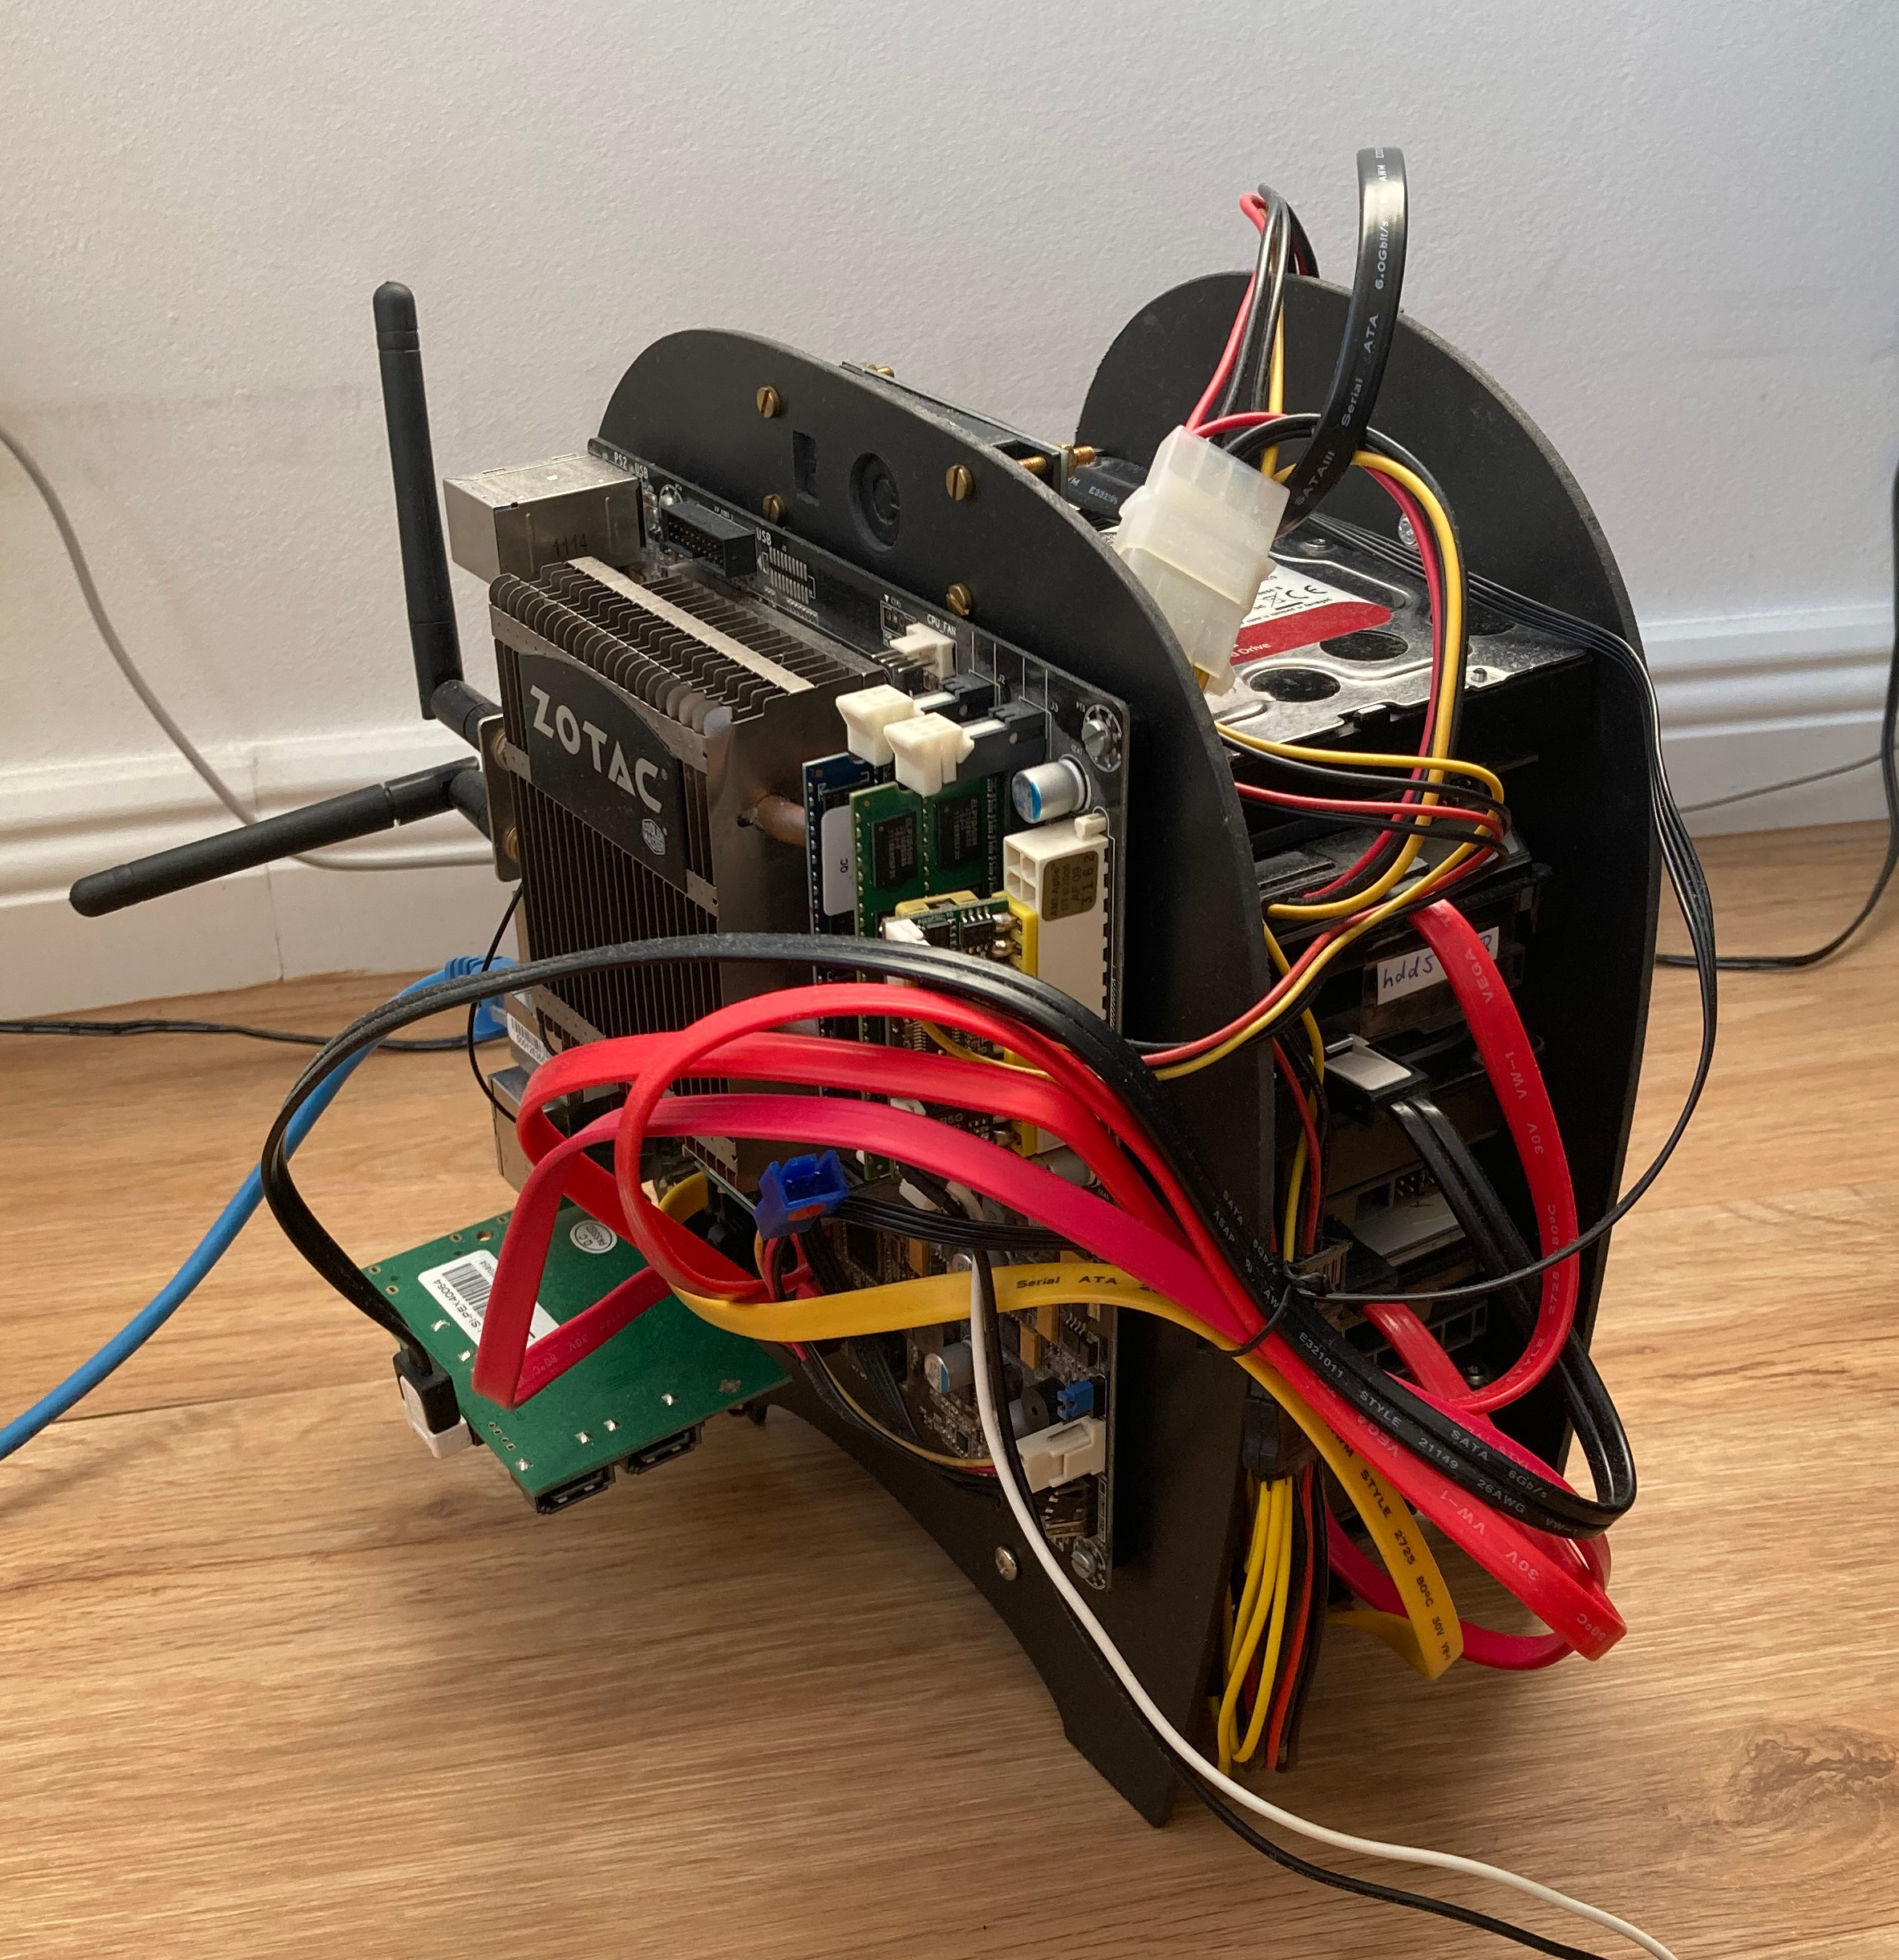
Without the cables, the whole setup still looked quite neat. With cables, it was a different story, but hey, at least it still booted up!
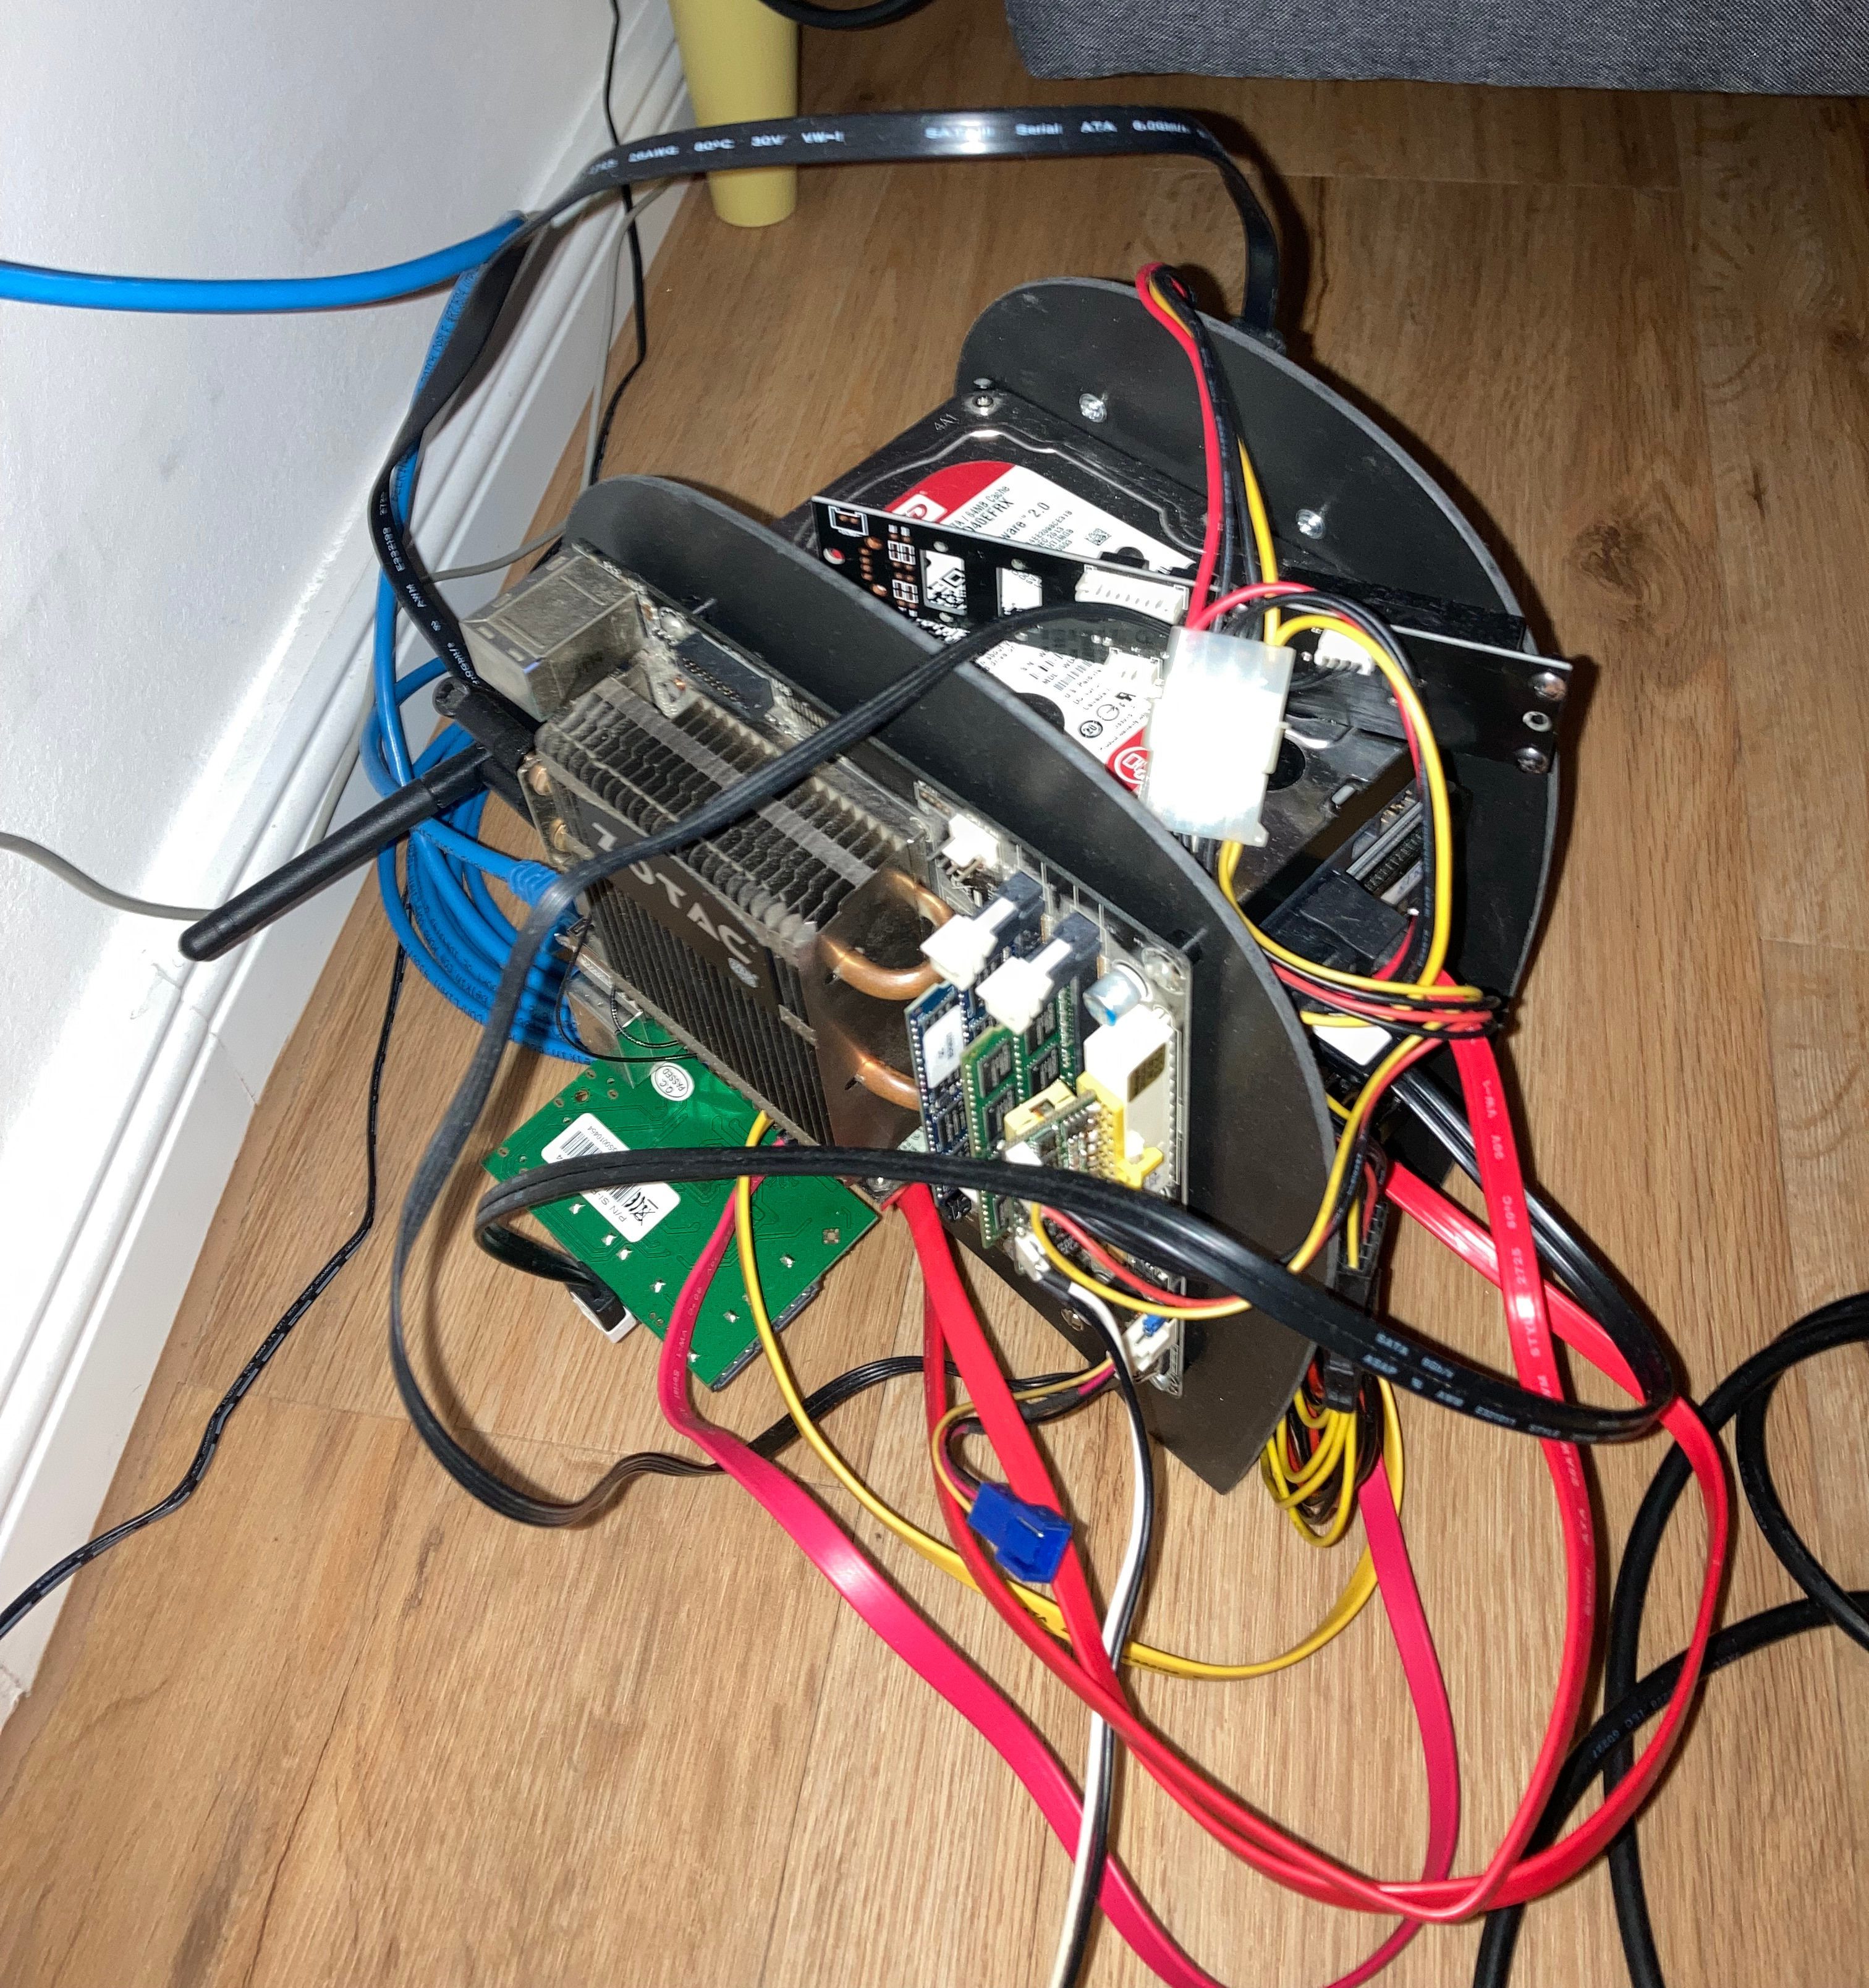
So I cut small slots along the edge of the front panel and tied mainly the SATA cables to them. The power cables already seemed short and tight enough. The final challenge was the power button. The original case had come with a PCB strip containing buttons, status LEDs, as well as USB and audio connectors (visible lying across the top in the photo above). I decided to reuse the power/reset button part by cutting it off from the rest of the PCB and cutting holes for the buttons into the top of the front panel. I used the fretsaw again, scared of cutting away too much, and then lots of tedious chipping with a pen knife and endless sanding. Laser cutting would have been helpful here.
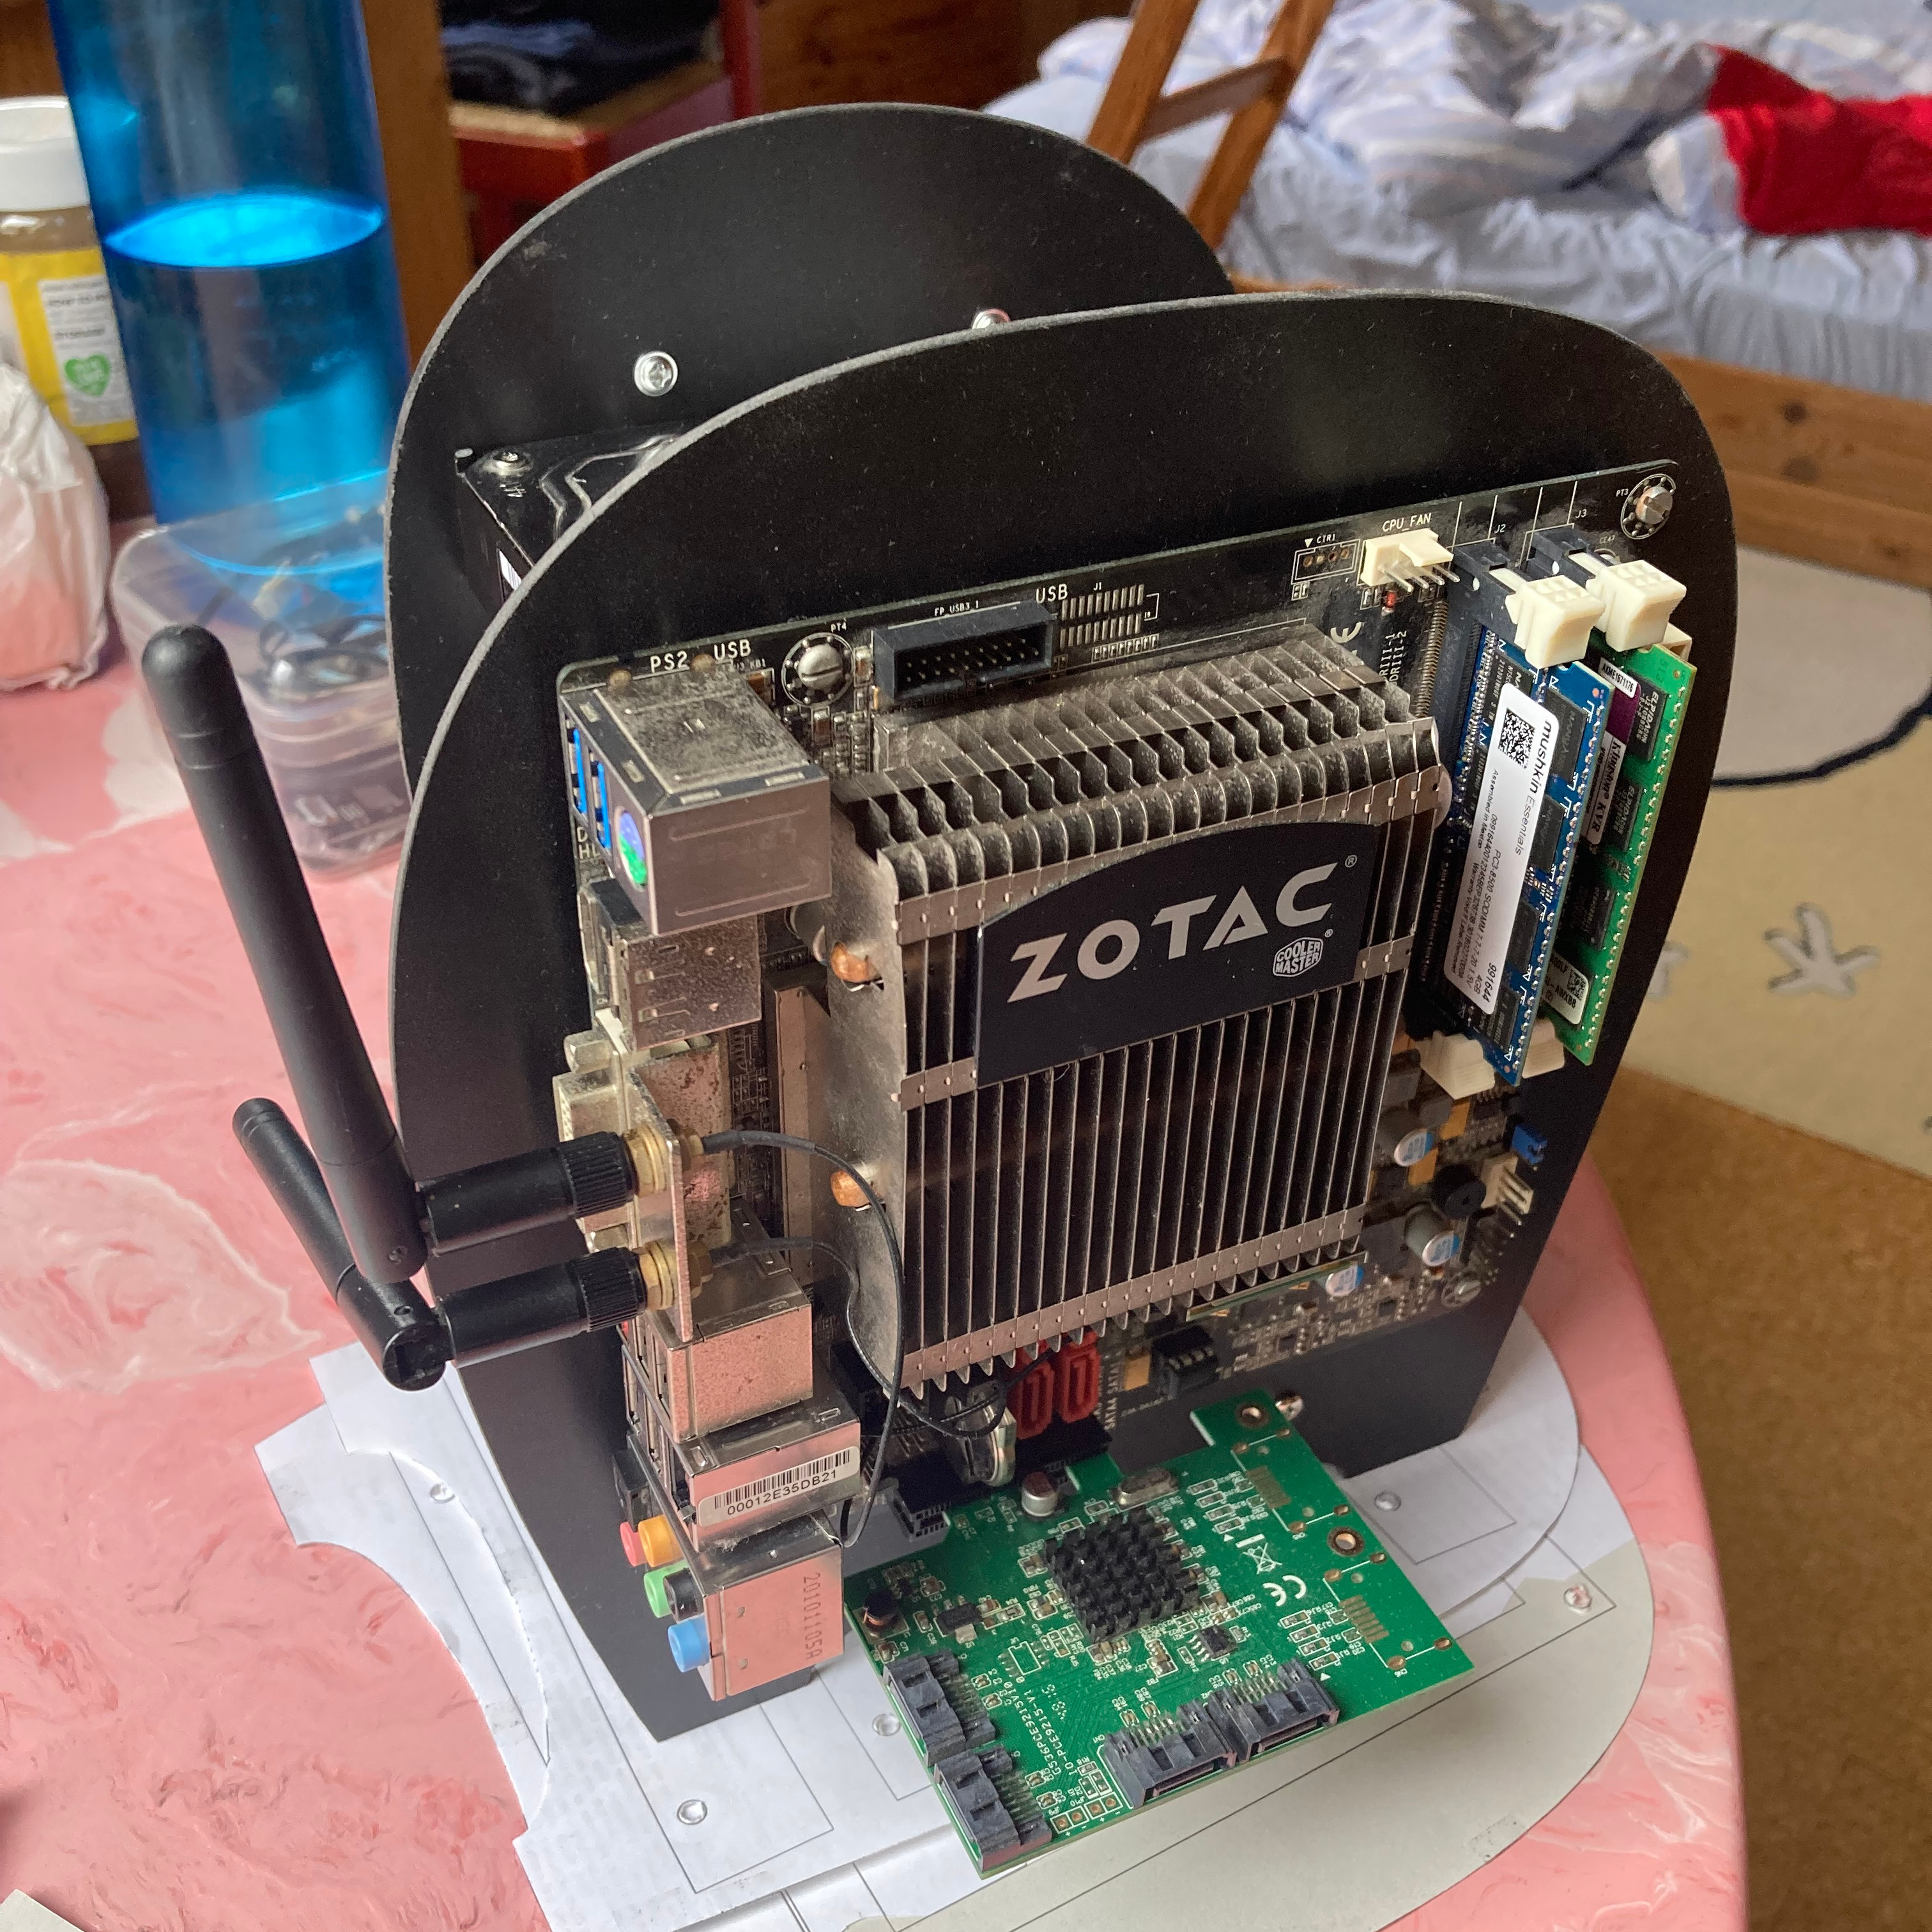
The result

There are still some drawbacks which I might eventually want to improve on in a version 2: The green SATA controller card is only held by its PCIe slot, wobbly, and too exposed. I'm worried about eventually breaking it off, but I haven't yet found a nice way of safely attaching it to the plate or mainboard. And when all drives are active (should be rare during regular use), heat does accumulate in the stack and the top drives can become unacceptably hot. Not wanting to add a fan, mounting the drives vertically should enable the natural airflow to help.
But that being said, I'm quite happy with the result for now. It's as compact and lightweight as it probably can get, given the preexisting components. I'm happy with the foam material as well. I've briefly operated the HDDs directly on the floor, which was really rather noisy, while its just a little hum when they're mounted between the foam plates. I've also dis- and reassembled the whole server multiple times by now, which can be done in just a few minutes. And last but not least, it looks unusual and interesting enough.